
 Pin it
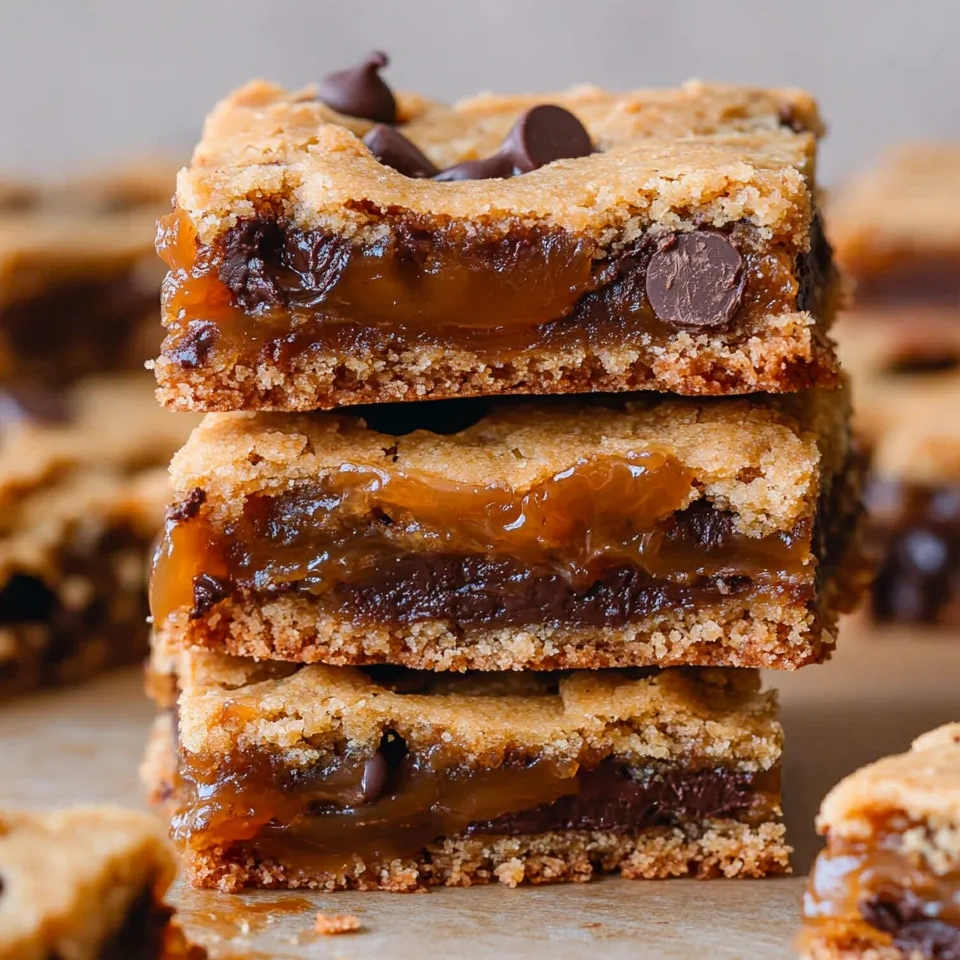
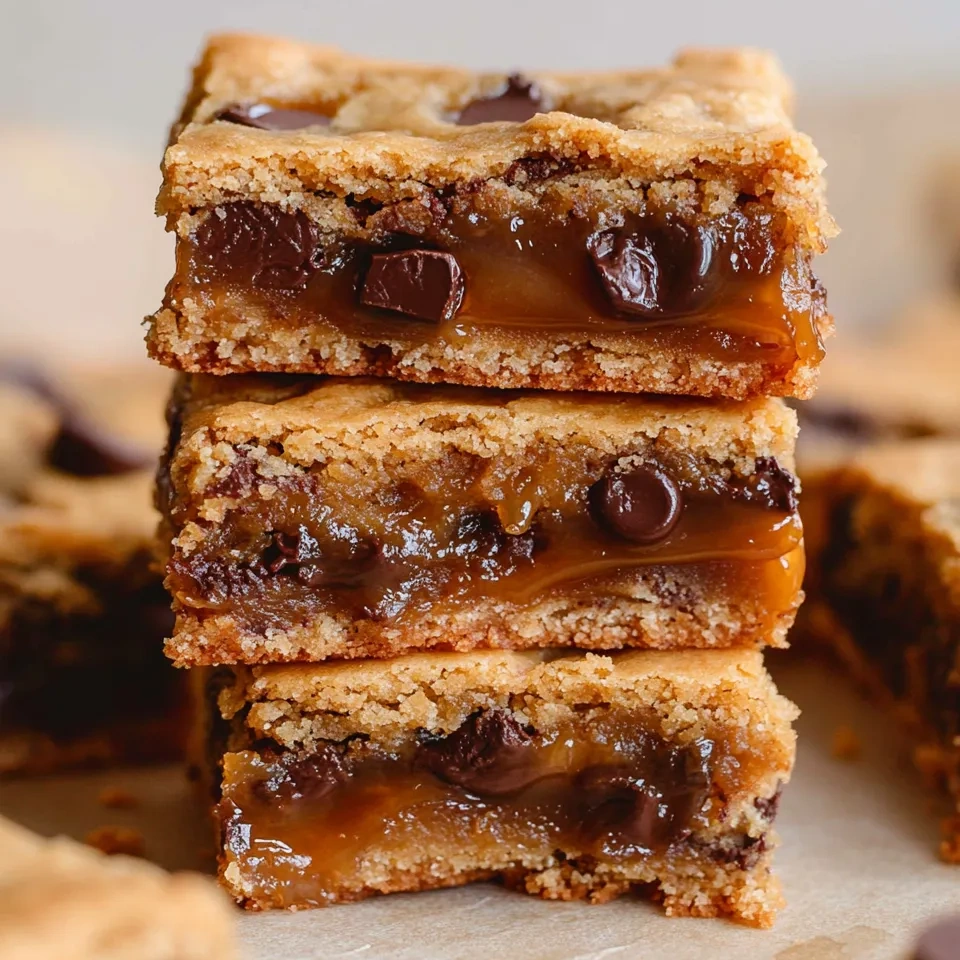
These salted caramel chocolate chip cookie bars have become my go-to dessert whenever I need something that looks impressive but doesn't require fancy techniques. The combination of chewy cookie base, gooey caramel center, and that perfect sprinkle of flaky salt creates layers of flavor that make everyone think you spent hours in the kitchen.
I discovered this recipe during a particularly busy holiday season when I needed something special but didn't have time for individual cookies. Now it's requested at every family gathering, and I've learned that the secret is not skipping the flaky salt on top - it really makes the caramel pop.
Ingredients
- 2 ¼ cups all-purpose flour: the foundation that gives these bars their perfect chewy texture
- 1 teaspoon baking soda: creates just enough lift without making them cakey
- 1 teaspoon salt: balances the sweetness and enhances the chocolate flavor
- 2 sticks unsalted butter at room temperature: must be soft for proper creaming
- ½ cup granulated sugar: adds sweetness and helps create crispy edges
- ½ cup packed brown sugar: brings moisture and that deep molasses flavor
- 1 teaspoon pure vanilla extract: use the real stuff for best flavor
- 2 large eggs: binding agents that create the perfect texture
- 1 cup semi-sweet chocolate chunks: chunks work better than chips as they create pockets of melted chocolate
- 1 cup homemade salted caramel sauce: the star ingredient that sets these apart
- ½ teaspoon flaky kosher or sea salt: finishing touch that makes everything shine
Step-by-Step Instructions
- Prepare Your Pan:
- Preheat oven to 350°F and line a 9×13-inch baking pan with parchment paper, leaving some overhang for easy removal. This prevents sticking and makes cleanup effortless.
- Mix the Dry Ingredients:
- In a medium bowl, whisk together flour, baking soda, and salt until completely combined. This ensures even distribution of leavening agents throughout the batter.
- Cream Butter and Sugars:
- Using an electric mixer with paddle attachment, whip the room temperature butter with both sugars and vanilla extract for about 2 minutes until the mixture is light and fluffy. This creaming process is crucial for texture.
- Add the Eggs:
- Scrape down the bowl sides with a spatula, then add eggs one at a time, mixing until well combined after each addition. This prevents the mixture from curdling.
- Incorporate Dry Ingredients:
- Add the flour mixture to the butter mixture and mix until just combined. Overmixing develops gluten and creates tough cookie bars.
- Fold in Chocolate:
- Gently stir in the chocolate chunks until evenly distributed throughout the dough.
- Assemble the Bars:
- Press half of the cookie dough into your prepared pan, creating an even layer. Spread the caramel sauce over this base, then drop small pieces of the remaining dough over the caramel. Don't worry about perfect coverage - rustic looks better.
- Bake to Perfection:
- Bake for 25 to 30 minutes until the center is just set and the edges are lightly golden. The bars will continue cooking slightly from residual heat.
- Finish and Cool:
- Immediately sprinkle the flaky salt over the hot bars, then lift the parchment paper to transfer everything to a cooling rack. Cool completely before cutting to prevent the caramel from oozing out.
 Pin it
You Must Know
My favorite part about these bars is watching people take that first bite and pause with surprise at the caramel center. I've made them for office parties, school fundraisers, and countless family dinners, and they disappear faster than any other dessert I make.
Storage and Keeping
Store these bars in an airtight container at room temperature for up to three days, though they rarely last that long in my house. For longer storage, refrigerate for up to one week. The bars actually taste even better the next day as the flavors meld together. If freezing, wrap individual bars in plastic wrap before placing in freezer containers to prevent freezer burn.
Ingredient Substitutions
While I always recommend homemade caramel sauce for the best flavor, good quality store bought works in a pinch when time is short. You can substitute the chocolate chunks with milk chocolate, dark chocolate, or even white chocolate chips depending on your preference. For a different twist, try using half chocolate chunks and half butterscotch chips.
Serving Suggestions
These bars are perfect on their own, but they become extra special when served slightly warmed with a scoop of vanilla ice cream. For elegant dinner parties, cut them into smaller squares and dust with powdered sugar. They also pair beautifully with coffee or a glass of cold milk for an afternoon treat.
 Pin it
The Secret to Perfect Caramel
The key to success with these bars lies in the caramel layer. If making your own, let it cool slightly before spreading so it doesn't melt the bottom cookie layer, but don't let it cool so much that it becomes difficult to spread. The caramel should be pourable but not hot.
Frequently Asked Questions About Recipes
- → Can I use chocolate chips instead of chunks?
Yes, chocolate chips work just as well. You can use milk, dark, or semi-sweet based on your taste preference.
- → Should I make my own caramel sauce?
Homemade caramel adds the best flavor and texture, but a good-quality store-bought version can be used in a pinch.
- → Can these cookie bars be frozen?
Yes, once cooled and cut, they freeze well for up to 3 months. Thaw at room temperature or microwave briefly before serving.
- → What’s the best way to store leftovers?
Store in an airtight container on the counter for up to 3 days or refrigerate for up to a week.
- → How do I prevent the caramel from melting during reheating?
Reheat gently and avoid over-microwaving to keep the caramel layer intact without melting excessively.